In this article
Quick answer: Spraying a set of house shutters is fast, often just a few hours of working time for a typical home's worth. But because each shutter has two faces that must dry separately before you flip it, the realistic total calendar time is 1 to 2 days, and longer if you want a full cure before rehanging. The dry-and-flip cycle, not the spraying, is what sets the clock on shutters.
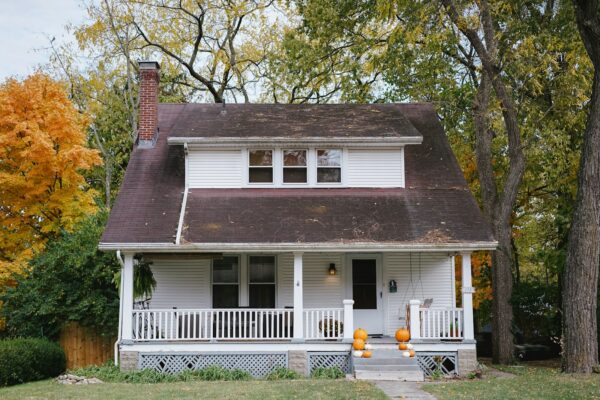
Shutters look like a quick afternoon project, and the painting itself nearly is. The catch is that they are almost always taken down and finished off-site, which means you are coating one side, waiting, flipping, coating the other, and waiting again. Homeowners planning a weekend and painters quoting a batch both need to budget for that waiting, not just the spraying. Run your numbers through our painting estimate calculator or request a free painting estimate so the labor and the calendar both make sense before you start pulling shutters off the wall.
How long does it take to paint shutters

The table below shows realistic ranges for common shutter jobs in 2026. Working time is hands-on spraying and prep. Total calendar time includes the dry-and-flip cycle and a cure buffer before rehanging.
| Size/scope | Working time | Total calendar time | Notes |
|---|---|---|---|
| 1 to 2 pairs (single window or two) | 1 to 2 hours | 1 day | Remove, scuff, spray, flip, rehang next morning |
| Average home (6 to 10 shutters) | 2 to 4 hours | 1 to 2 days | Batch spray on sawhorses, one flip cycle |
| Large home (12 to 20 shutters) | 4 to 6 hours | 2 days | More units to stage and flip, possible second coat |
| Vinyl or plastic shutters (any count) | add 1 to 2 hours | 2 days | Light scuff plus bonding primer adds a dry step |
Working time vs calendar time
On shutters the gap between working time and calendar time is dramatic, and understanding it prevents a lot of frustration. Working time is the hands-on part: pulling the shutters, scuffing and cleaning them, masking nothing because they are off the wall, and spraying. For a normal home's set, all of that adds up to just a few hours.
Calendar time is the full span from when you take the first shutter down to when the last one is back on the wall. That span is driven entirely by drying. You spray one face, wait for it to dry to the touch and ideally a bit beyond, flip the shutter, spray the other face, and wait again. Even with fast-drying enamel, that single flip cycle pushes a few hours of spraying into a one to two day calendar window. If you rush the flip before the first face has set, you mar the finish and have to refinish, which costs you far more time than the wait would have. The lesson is simple: shutters are a fast job that you cannot hurry.
What drives the timeline
Even a small shutter job moves through the same phases, and each one claims part of the calendar:
- Remove and clean: Take the shutters off the house, label their positions, and wash off dirt, cobwebs, and chalk. Let them dry.
- Scuff and prime: Lightly scuff-sand the surface for adhesion. Vinyl and plastic shutters get a bonding primer; wood and previously painted ones may just need spot priming.
- Coats: Usually two thin coats per face, sprayed for a smooth finish. Spraying is quick but each coat is one side at a time.
- Dry and flip: The signature phase. Each face must dry before you flip to the other, and the recoat window governs how fast you can move.
- Cure before rehang: Even after the paint feels dry, a cure window helps the finish harden so handling and rehanging do not leave marks.
Knowing how fast spraying goes is the easy part. Our guide to painting production rates covers the labor side, but on shutters the binding constraint is drying, so the more useful read is how long paint should dry between coats, which explains the recoat windows that set the rhythm of every flip.
What makes shutters different on the clock
They are a small per-unit job that is almost always done off-site. Unlike siding or a door you paint in place, shutters come down and get finished flat on sawhorses or a spray table, usually in a garage or driveway. That off-site approach gives a beautiful sprayed finish, but it adds the remove-and-rehang steps to the timeline and means the whole job lives or dies by your staging space and drying area.
The dry-and-flip cycle, not the spraying, sets the calendar. You can spray a dozen shutter faces in well under an hour. What you cannot speed up is the wait between faces. Lay them out, spray every front, wait for them to dry, flip the whole batch, spray every back, and wait again. Batching many shutters at once is efficient for spraying but does not shorten the dry windows, so even a big set rarely needs more than two days if you stage it well.
Vinyl and plastic shutters need a light scuff and a bonding primer. Modern homes often have molded vinyl or composite shutters, and paint does not stick to their slick surface without help. A light scuff-sand plus a coat of bonding primer is non-negotiable, and that primer is one more layer that has to dry before the color coats go on. That single extra dry step is why vinyl shutters usually land at a two-day calendar even when the count is small.
One thing that quietly lengthens a shutter job is the prep on louvered slats. Fixed-louver shutters, the kind with rows of angled slats, are slow to clean and slow to coat because dirt collects in the louvers and paint wants to pool there. Each slat has top and bottom surfaces that the spray has to reach from the right angle, so even though the shutter is small, getting full coverage without runs takes more passes than a flat panel would. Plan extra minutes per louvered unit, and inspect each one in raking light before you call it done, because missed slat edges are the most common shutter touch-up.
A realistic timeline example
Here is how a typical home with eight wood-and-composite shutters plays out, hour by hour across two days:
- Day 1, morning: Remove all eight shutters, label their positions, wash them down, and let them dry while you set up sawhorses and masking in the garage.
- Day 1, midday: Scuff-sand each shutter, wipe off dust, and spray bonding primer on the front faces. Let primer dry.
- Day 1, afternoon: Flip and prime the back faces. Once dry, spray the first color coat on the fronts.
- Day 1, evening: Flip and apply the first color coat to the backs. Leave everything to dry overnight.
- Day 2, morning: Spray the second color coat on the fronts, let dry, flip, and coat the backs.
- Day 2, afternoon: Allow a cure window, then rehang all eight shutters in their labeled positions.
Total hands-on spraying and prep here is maybe 3 to 4 hours of working time, but the dry-and-flip rhythm spreads it across 2 calendar days. Skip the flips and try to do it all in an afternoon and you will smudge wet faces and lose far more time fixing them.
DIY vs hiring a pro: the timeline difference
Shutters are one of the more DIY-friendly exterior jobs, but pace still differs:
- A professional: Sprays with proper equipment, has a dedicated drying rack or stand system that lets them paint both faces of vertically hung shutters, and often finishes the spraying in a single visit with rehang the next day.
- A homeowner with a brush or rattle can: Works one face at a time on sawhorses, waits out each dry window, and usually spreads the job across a weekend. Brushing slats is slow and fiddly, so DIY shutter painting takes longer per unit than the spray time alone suggests.
- The honest gap: A pro might quote a few hours of labor plus a return trip, while a homeowner realistically gives up most of a Saturday and part of a Sunday. The work is genuinely approachable, but the louvered slats and the flip cycle reward patience over speed.
Factors that change the timeline
- Weather and humidity: Painting outdoors or in an open garage, high humidity and cool air slow each dry step and stretch the flip cycle. Damp days can turn a two-day job into three.
- Condition of the shutters: Peeling, chalky, or sun-faded shutters need more scrubbing and scuffing, while vinyl ones with a slick factory finish need extra adhesion prep.
- Number of coats and units: More shutters mean more faces to stage and flip, and a color change or a glossy finish may call for a second or third coat, each with its own dry window.
- Access and staging: Removing shutters that are caulked or screwed tight takes time, and a cramped garage limits how many you can lay out to dry at once, which slows batching.
- Drying conditions: A cool, shaded, or poorly ventilated drying space lengthens every recoat window, while warm, dry, moving air shortens the whole calendar.
Batching is the single biggest efficiency lever on a multi-shutter home, so it is worth planning before you pull the first unit. If you can lay out every shutter front-side up at once, you spray all the fronts in one pass, wait through a single dry window, flip the entire batch together, and spray all the backs in a second pass. That turns a dozen separate dry-and-flip cycles into just two, which is the difference between a tidy two-day job and a frustrating week of doing two shutters at a time. The constraint is space: you need enough sawhorses, racks, or clean floor to stage the whole set flat. A homeowner with a one-car garage may have to split a large set into two batches, and each extra batch adds another dry window to the calendar.
It also pays to label and photograph the shutters before removal. Many homes have left and right shutters that are mirror images, or units sized to specific windows, and getting them back on the wrong openings means re-drilling mounts and sometimes touching up. A quick photo of each window with its shutters in place, plus a piece of tape numbering each unit, costs five minutes up front and saves an annoying rehang scramble at the end of an otherwise smooth job.
Shutters are a quick win as long as you respect the flip cycle and do not rush wet faces. Price the job with our painting estimate calculator or grab a free painting estimate, then plan around the drying, not the spraying. For the money side, see the cost to paint shutters homeowner guide and the painter-facing how much to charge to paint shutters breakdown. To compare timelines on other small exterior features, check how long it takes to paint a front door and a garage door.
Frequently asked questions
How long does it take to paint a set of shutters?
The spraying itself takes only a few hours for a typical home's worth of shutters, often two to four hours of hands-on work. Because each face must dry before you flip and coat the other, the full job spans 1 to 2 calendar days, plus a short cure window before you rehang them on the house.
Why do shutters take more than a day even though spraying is fast?
The dry-and-flip cycle drives the calendar, not the spraying. You coat one face, wait for it to dry, flip the shutter, coat the back, and wait again. Vinyl and plastic shutters add a bonding primer that needs its own dry step. Those mandatory waits push a few hours of spraying into a one to two day span.
Do you have to remove shutters to paint them?
Most painters take shutters down and spray them off-site for the cleanest finish and to paint the edges and backs properly. You can paint them in place with a brush, but it is slower, messier, and harder to get an even coat into the slats. Removing them also protects your siding from overspray.
How long before you can rehang painted shutters?
Let the final coat dry fully and ideally give it a short cure window before rehanging, so handling does not dent or smear the finish. With fast-drying enamel that can be a few hours, but giving it overnight is safer. Rushing the rehang while the paint is still soft is the most common way to ruin a fresh shutter finish.
Do vinyl shutters take longer to paint than wood?
Yes, slightly. Vinyl and plastic shutters have a slick factory surface that paint will not grip without a light scuff and a bonding primer. That primer is an extra layer that has to dry before the color coats, which usually pushes a vinyl shutter job to a full two-day calendar even when the unit count is small.
Picking up materials first? See how much paint shutters needs.