In this article
- Why New Paint Will Not Stick To A Glossy Surface
- Step One That Everyone Skips: Clean And Degrease
- Three Ways To Give Glossy Paint Tooth
- The Tape Adhesion Test
- Trim And Doors Are The Usual Suspects
- Prep Methods Compared
- Choosing Your Topcoat And Sheen
- How Many Coats And Drying Between Them
- Glossy Walls Versus Glossy Trim
- Common Mistakes On Glossy Surfaces
- Cost And When To Call A Pro
- Frequently asked questions
Quick answer: New paint fails on glossy paint because it cannot grip the slick sheen. Always clean and degrease first, then give the surface tooth at least one of three ways: scuff-sand it dull, wipe on a liquid deglosser, or apply a bonding primer. Confirm your prep worked with a simple tape adhesion test before you commit.
You roll a fresh coat over an old glossy wall or trim, it looks fine, and a few weeks later it is peeling at the edges or scratching off with a fingernail. The paint is not defective. The problem is adhesion. Glossy and semi-gloss surfaces are smooth and slick by design, and new paint beads and slides off them the way water beads on a waxed car. Fix the adhesion and the same paint sticks for years. This guide covers the three ways to give a shiny surface tooth, why cleaning comes first, and a quick test to prove your prep worked before you paint the whole room. If you want the project cost either way, our painting cost calculator has you covered.
Why New Paint Will Not Stick To A Glossy Surface

Paint bonds mechanically and chemically to the surface under it. A flat or eggshell wall has microscopic texture that paint keys into. A glossy or semi-gloss surface is engineered to be smooth and non-porous so it wipes clean and resists stains, and that same smoothness gives new paint almost nothing to hold onto. The result is a weak bond that looks fine at first and then fails under normal stress: door slams, cleaning, temperature swings, or just time. Every fix in this guide exists to solve one problem, which is turning a slick surface into one that new paint can grab. It is worth internalizing that point, because once you understand that adhesion is the only real issue, every step below makes obvious sense and you stop being tempted to skip the ones that feel tedious.
Step One That Everyone Skips: Clean And Degrease
Before you sand or prime anything, clean the surface. Glossy paint is most common on trim, doors, kitchens, and bathrooms, which are exactly the places that collect hand oil, cooking grease, hairspray, and soap film. If you sand or prime over that grime, you seal the contamination in and your paint bonds to grease instead of to the surface. Wash the area, let it dry fully, and only then move to giving it tooth. Our guide to cleaning walls before painting explains the why and the how, and it is genuinely the step that saves the most failed paint jobs. Treat cleaning as mandatory, not optional, on any glossy surface.
Three Ways To Give Glossy Paint Tooth
After cleaning, you need to defeat the sheen. There are three proven methods. Do at least one. For the most reliable result, professionals often clean and then combine two, such as a light scuff-sand followed by a bonding primer.
Method one: scuff-sand. Sanding the glossy surface dull is the most dependable way to create tooth, because it physically roughens the finish. You are not stripping the paint, just knocking the shine off until the surface looks uniformly matte. Our wall sanding guide covers grit choice and technique. Wipe off all the dust afterward, because sanding dust is its own adhesion killer.
Method two: liquid deglosser. Where sanding is impractical, such as detailed trim, spindles, or a large surface you do not want to hand-sand, a liquid deglosser (sometimes called liquid sandpaper) chemically dulls the sheen. You wipe it on, let it work, and it etches the surface enough for paint to grip. It is faster than sanding on intricate profiles and creates no dust, though you must follow the product ventilation and dry-time directions.
Method three: bonding primer. A bonding or adhesion primer is formulated to stick to slick surfaces that normal primer cannot, and to give your topcoat a grippable base. Used over a cleaned surface, it can bridge the adhesion gap on its own, and it is the safest choice on very slick factory finishes. Our guide on whether you need primer before painting explains when a bonding coat is the right call.
The Tape Adhesion Test
Do not paint a whole room on faith. After you have cleaned and given the surface tooth (and primed, if you primed), run a quick tape adhesion test to confirm the bond. Paint a small test patch, let it cure per the label, then press a strip of painter’s tape firmly onto the patch and pull it off sharply. If the paint stays put, your prep worked and you can proceed with confidence. If the paint lifts onto the tape, the surface is still too slick, and you need more tooth: sand harder, add a bonding primer, or both. Five minutes on this test can save you from repainting an entire room. It is the single best insurance a DIY painter has on a glossy surface.
Trim And Doors Are The Usual Suspects
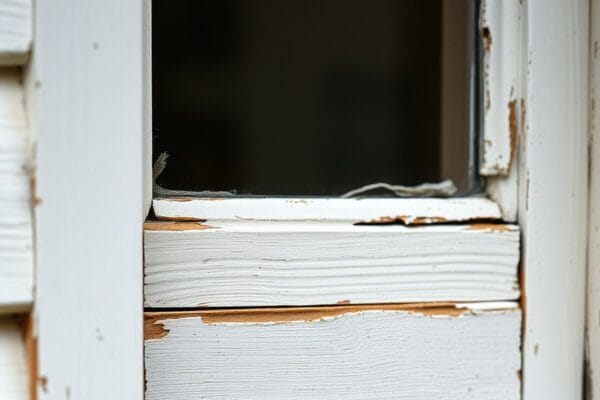
Most glossy paint problems show up on trim, baseboards, and doors, because those surfaces are traditionally finished in semi-gloss or gloss for durability and wipeability. When you repaint them, the same adhesion rules apply: clean, degloss or scuff, and prime the slick spots. Our guide to the best paint for trim and doors covers durable enamel choices, and a waterborne alkyd enamel is one category that flows out smoothly and cures hard while cleaning up with water. If your old glossy trim paint is already lifting or flaking, do not paint over the failure. Address it first using our guide on fixing peeling paint, because a new coat over peeling paint just peels with it.
Prep Methods Compared
| Method | Best for | Effort | Notes |
|---|---|---|---|
| Scuff-sand | Flat walls, doors, large surfaces | Medium | Most reliable tooth, creates dust to clean up |
| Liquid deglosser | Detailed trim, spindles, tight areas | Low | No dust, follow ventilation and dry time |
| Bonding primer | Very slick factory finishes | Medium | Adds a coat, safest on the slickest surfaces |
| Clean plus one method | Any glossy surface | Medium | Recommended baseline, cleaning always first |
Choosing Your Topcoat And Sheen
Once you have created tooth and, if needed, primed, your topcoat can be any quality interior paint. If you are painting over glossy trim, an enamel-grade finish gives you the hard, washable surface trim needs. If you are dropping the sheen on a wall from semi-gloss to eggshell or matte, remember that lower sheens hide surface flaws better, while higher sheens highlight every ridge and roller mark. Our paint sheen guide walks through matching sheen to the room and the wear it takes. Whatever sheen you choose, the adhesion prep is the same, so do not let a lower-sheen topcoat lull you into skipping the tooth step.
How Many Coats And Drying Between Them
Over a properly prepped glossy surface, plan on two topcoats, plus a bonding primer coat if you went the primer route. The prep is what matters most here, not the coat count, because no number of topcoats fixes a surface that still has a glossy sheen underneath. If you are dropping from a dark glossy color to a light one, or covering a bold trim color, you may need an extra coat or a tinted primer to fully hide it. Our guide on how many coats of paint you need explains how color change drives the number. Respect the recoat window on the can between coats. Water-based paint can feel dry to the touch long before it has cured enough to recoat or take handling, and on trim and doors especially, rushing the second coat or reinstalling hardware too soon leaves marks in a soft finish. Patience during curing is part of why the tape test earlier is worth doing on a cured patch, not a freshly painted one.
Glossy Walls Versus Glossy Trim
The adhesion rules are the same, but the practical approach differs by surface. On a large glossy wall, scuff-sanding is efficient because you can cover big areas quickly with a sanding pole, and the flat expanse takes a roller well. On trim, doors, spindles, and detailed molding, hand-sanding every profile is tedious, so a liquid deglosser or a bonding primer often makes more sense, and you will usually brush rather than roll. Doors deserve special mention: they get handled constantly, so their bond is stress-tested every day, which is exactly why a skipped degloss shows up as peeling around the knob and edges first. Whatever the surface, the sequence never changes, clean, create tooth, prime the slick spots if needed, then two topcoats. Matching the tooth method to the surface just makes the work faster and the result more even.
Common Mistakes On Glossy Surfaces
- Skipping the cleaning step. Sanding over grease seals the grease in. Clean first, every time.
- Doing nothing to the sheen. Painting straight onto gloss is the number one cause of peeling. Always create tooth.
- Not wiping off sanding dust. Dust between coats prevents bonding just as much as gloss does.
- Skipping the tape test. Five minutes of testing beats repainting a whole room.
- Painting over already-peeling gloss. Fix the failure first, or the new coat lifts with the old.
Cost And When To Call A Pro
Painting over glossy paint is very DIY-able, and the added cost over a normal repaint is minor: some sandpaper or deglosser and possibly a bonding primer. The value of a pro shows up on extensive high-gloss trim work or when the existing finish is failing and needs proper repair before recoating. To see whether hiring out makes sense for your room, run the numbers in the cost calculator or request a free painting estimate and weigh it against your own weekend. Getting the adhesion right is the whole ballgame here, so budget your time for prep rather than for extra coats. A cleaned, deglossed, well-primed surface with two topcoats will outlast a rushed job with four coats every single time, because durability on a glossy surface comes from the bond, not the thickness.
Frequently asked questions
Do I have to sand glossy paint before repainting?
You have to defeat the sheen somehow, and sanding is the most reliable method. If sanding is impractical, a liquid deglosser or a bonding primer can create the tooth instead. What you cannot do is paint straight onto a glossy surface and expect it to hold.
What is liquid sandpaper and does it really work?
Liquid sandpaper, also called a deglosser, is a wipe-on product that chemically dulls a glossy finish so paint can grip. It works well on detailed trim and tight spots where hand-sanding is awkward, and it leaves no dust. Follow the label for ventilation and dry time.
Can I just use a bonding primer instead of sanding?
Often yes. A bonding primer is designed to adhere to slick surfaces and give your topcoat a base to grab. On very slick factory finishes it is the safest single step. For the most durable result, many painters clean, lightly scuff, and then bonding-prime.
How do I test if my prep worked?
Use the tape adhesion test. Paint a small patch, let it cure, press painter’s tape firmly onto it, and pull sharply. If the paint stays put, your prep is good. If it lifts onto the tape, add more tooth with sanding or a bonding primer before painting the whole surface.
Why is my new paint peeling off the trim?
Trim is usually glossy or semi-gloss, and new paint peels when it was applied without cleaning and creating tooth first. It can also peel if the old paint was already failing. Clean, degloss or scuff, prime the slick spots, and fix any existing peeling before recoating.
How much does it cost to repaint glossy walls or trim?
The added cost over a normal repaint is small, mainly sandpaper or deglosser and possibly a bonding primer. Total cost depends on room size and whether you hire out. Treat any figure as a typical range, verify locally, or use the calculator for a project-specific number.
Baked enamel toilet partitions are one of the hardest glossy surfaces painters are asked to coat. How they are prepared and priced is covered in how to price painting restroom partitions.