In this article
- Job one: reaching the tall stairwell walls safely
- Cutting in and keeping a wet edge on tall walls
- Job two: painting the staircase itself
- Choose a durable enamel that resists foot traffic
- Paint every other tread so the stairs stay usable
- Tape and edge where risers meet treads
- Allow a long cure before full foot traffic
- How much paint and what it costs
- Frequently asked questions
Quick answer: Painting stairs is really two jobs, and access safety is the biggest issue in both. For the tall stairwell walls, reach height safely with an adjustable ladder fitted with a stair leveler or a plank set between a ladder and the steps, never a ladder balanced on a single tread. For the staircase itself, use a durable enamel and paint every other tread so the stairs stay usable while drying. Price it with the cost to paint a stairwell or the painting cost calculator.
Stairs are one of the more dangerous painting projects in a house, and it is worth being honest about that up front. You are working at height over a hard, uneven drop, and the surface you paint has to stay safe to walk on afterward. Rushing either part leads to falls, slippery treads, or a staircase you cannot use for a day. Plan the access and the sequence carefully and it becomes very manageable.
This guide splits the work into the two jobs it really is: the tall stairwell walls above the stairs, and the staircase itself, meaning the treads, risers, stringers, handrail, and balusters. Safety runs through both. Let us take them in order.
Job one: reaching the tall stairwell walls safely
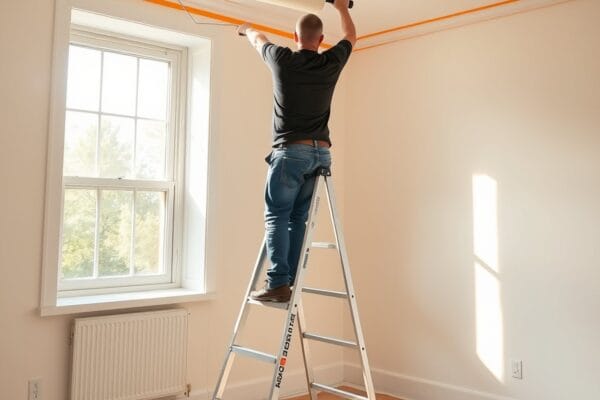
The walls above a staircase are usually the tallest in the house, and the floor beneath your ladder is a set of steps, not level ground. That combination is where stair-painting accidents happen. Never set a standard ladder with one leg on a step and one on the landing, and never balance a ladder on a single tread. You need a setup that gives you a level, stable base at height.
The two proven approaches:
- Adjustable ladder with a stair leveler. A ladder with independently adjustable legs, or a purpose-made stair leveler accessory, lets each leg sit at a different height so the ladder stands level on the stairs.
- Plank or scaffold between a ladder and the stairs. A stable plank or scaffold board run from a rung of a ladder on the landing to a solid point on the stairs creates a level walkway to work from. It must be rated for the load and firmly secured at both ends.
Whatever you use, follow the equipment manufacturer’s instructions and weight ratings. Set it on a firm base, keep three points of contact when climbing, and do not overreach. If a section is beyond a safe setup, that is exactly the kind of job where hiring a pro with proper staging is worth it.
Cutting in and keeping a wet edge on tall walls
Once you have safe access, the wall technique is the same as any wall, just harder to reach. The challenge is keeping a wet edge across a tall run when you can only comfortably reach a band at a time from each ladder position.
- Cut in the top edge and corners from your stable setup first, then roll while that band is still wet.
- Work in vertical sections you can complete before the edge dries, blending each new section into the last.
- Use an extension pole on the roller so you can cover more of the wall from one safe position instead of repositioning constantly.
The full streak-free rolling method, including the W pattern, the wet edge, and laying off, is in how to paint walls, and the brush technique for the cut lines is in cutting in. On tall stairwell walls, plan your ladder moves so you are never tempted to lean out past your base to chase a wet edge.
Job two: painting the staircase itself
The staircase is a different animal from the walls. It takes foot traffic, it has many small parts, and it has to stay walkable. The parts you deal with are treads (the steps you stand on), risers (the vertical faces), stringers (the diagonal sides), and the handrail and balusters.
- Clean every surface thoroughly, since stairs collect shoe grime and oils that stop paint from bonding.
- Sand glossy old finishes so the new coat grips, then remove all dust.
- Fill gouges and nail holes, and caulk gaps where risers meet treads for a clean line.
- Prime bare or patched wood, and spot-prime knots or stains that could bleed through.
Safety note: stairs in homes built before 1978 may have lead in older paint, and sanding or scraping them can release lead dust. Have older paint tested, follow the EPA RRP guidance, or hire a certified professional. This is a real hazard, not legal advice.
Choose a durable enamel that resists foot traffic
Wall paint will not survive on treads. Steps need a hard-wearing coating made to take abrasion and foot traffic, generally a durable enamel or a product specifically labeled for floors and stairs. The treads take the most abuse, so this is not the place to economize on the coating.
- Use a durable enamel or floor-rated finish on treads and risers, and follow the label for the surface and traffic it is rated for.
- Consider slip resistance. Painted treads can be slick, and many floor and porch finishes offer a grit additive or a non-slip version. Follow the product guidance for adding traction.
- The handrail and balusters are essentially trim, so a durable trim enamel suits them. The technique for those spindly parts is the same as any trim work.
Because the handrail and balusters are trim, the brushing method for them is covered in how to paint trim and baseboards, including how to work around narrow spindles without drips and runs. Match your sheen choices using the paint sheen guide, keeping in mind that higher sheens on a handrail wipe clean but show every brush mark.
Paint every other tread so the stairs stay usable
Here is the trick that keeps a staircase functional during the job. If you paint every tread at once, you cannot use the stairs until they dry, which can strand you for hours. Instead, paint every other tread, let them dry enough to walk on, then paint the ones you skipped.
- Paint alternating treads first so you can step on the unpainted ones in between.
- Once the first set has dried enough to take foot traffic per the label, paint the remaining treads.
- Alternatively, paint one side of each tread at a time if the stairs are wide enough to walk the other side, though the every-other-tread method is simpler for most staircases.
Paint the risers and stringers on the same visits, working top to bottom so you are not walking over fresh paint. Plan the sequence before you open the can, and warn everyone in the house to stay off the wet steps.
Tape and edge where risers meet treads
The joint where a riser meets the tread is where paint lines get messy, especially if the two surfaces are different colors, which is a popular look. Clean edging here makes the whole staircase look sharp.
- Caulk the gap first so paint does not seep into a crack and look ragged.
- Tape the line between riser and tread if you want a crisp two-color separation, and pull the tape while the paint is still slightly wet for the cleanest edge.
- Cut in carefully along the stringers and against the wall so the staircase edges look intentional.
A good brush and a steady hand often beat tape on these tight interior corners, and the cut-in technique is the same as anywhere, in cutting in.
Allow a long cure before full foot traffic
This is the step that protects all your work. Treads dry to the touch long before they are fully cured, and walking on a soft enamel too soon leaves scuffs, footprints, and worn spots that show immediately. Enamels and floor finishes in particular can take a while to reach full hardness.
- Follow the cure time on the can, not just the dry-to-touch time, before returning full foot traffic. Cure times vary a lot by product and conditions, so check the label.
- Light, careful use may be fine sooner on alternating treads, but full, everyday traffic should wait for full cure.
- Keep the area ventilated to help the finish set, and keep pets and kids off until it has hardened.
For a realistic sense of how long the whole staircase and stairwell job takes, including this cure time, see how long it takes. Building that patience in is the difference between durable treads and ones you have to redo.
How much paint and what it costs
A stairwell job mixes a lot of tall wall area with a relatively small but detailed staircase, so estimate the two parts separately. The walls follow normal wall coverage, while the treads, risers, and balusters use a durable enamel that you buy on its own.
- Measure the tall wall area for the wall paint, remembering the height adds up fast.
- Estimate the enamel for treads, risers, stringers, and rails separately, and buy extra for the second alternating-tread pass.
- Account for primer on bare or patched wood.
A surface-by-surface way to estimate quantity is in how much paint. For the money side, the full breakdown is in cost to paint a stairwell, and if you want to understand pro pricing, see what painters charge. To get a tailored figure fast, run the painting cost calculator or request a free painting estimate. Because the height and access make stairwells one of the riskier DIY jobs, comparing your own cost against a pro quote is especially worthwhile here.
Frequently asked questions
How do I safely reach high stairwell walls?
Use an adjustable ladder with a stair leveler so each leg sits level on the different step heights, or set a rated plank or scaffold board between a ladder on the landing and a solid point on the stairs to make a level platform. Never balance a standard ladder on a single tread or with one leg on a step and one on the landing. If a section is beyond a safe setup, hire a pro with proper staging.
What paint should I use on stair treads?
Treads take heavy foot traffic, so use a durable enamel or a coating specifically rated for floors and stairs rather than wall paint, which wears through quickly. Follow the label for the surface and traffic it is made for. Because painted treads can be slippery, consider a non-slip version or a grit additive, applied per the product guidance.
How do I keep using the stairs while the paint dries?
Paint every other tread first, let those dry enough to walk on, then paint the ones you skipped, so there is always a set of steps to use. On wide stairs you can instead paint one side of each tread at a time. Work top to bottom on risers and stringers so you are never stepping over fresh paint.
Do I need to worry about lead paint on old stairs?
Possibly. Homes built before 1978 may have lead in older paint layers, and sanding or scraping stairs can release lead dust, which is a real hazard. Have the old paint tested, follow the EPA Renovation, Repair and Painting guidance, or hire a certified professional for the prep. This is a safety note, not legal advice.
How long before I can walk on painted stairs?
Wait for the full cure time on the can, not just dry-to-touch, before returning everyday foot traffic, because a soft enamel scuffs and wears where you step. Cure times vary widely by product and conditions. Light, careful use of alternating treads may be fine sooner, but full traffic and pets should wait until the finish has hardened.
How do I paint the balusters and handrail?
Treat them as trim. Use a durable trim enamel, work with a good brush around the narrow spindles, and keep an eye out for drips and runs that collect on the underside of rails and the base of balusters. The full technique for spindly trim, including avoiding runs, is the same as painting other trim and baseboards.
For painters quoting this work, the staircase itself is a separate item from the stairwell walls, with every baluster, newel and rail counted. The method is set out in how to price painting stair balusters and handrails.
Prefer to keep the wood grain? See how to stain wood stairs for sanding the treads, working every other step so the stairs stay usable, and a durable topcoat.
Painting outdoor steps instead? They need a walkable, slip-resistant floor grade coating rather than wall paint. See how to paint exterior stairs.